Automate Expense Reporting with Gmail Approval Workflow using Google Apps Script
Introduction
In today’s business environment, operational efficiency and rapid decision-making are paramount. Expense reporting, in particular, is often a time-consuming and labor-intensive process for many companies, and delays can impact project timelines and cash flow. Traditionally, expense reporting relied on paper-based forms or email exchanges, which posed risks of loss, difficulty in tracking, and lengthy approval lead times. With the widespread adoption of cloud-based tools, leveraging the powerful integration capabilities of Google Workspace (formerly G Suite), specifically Google Sheets, Gmail, and the underlying Google Apps Script (GAS), allows for a dramatic streamlining of the expense reporting process and the automation of approval workflows. This article provides a comprehensive guide, from basic knowledge to advanced applications and specific precautions, on practically how to use GAS to automatically route expense data from Google Sheets via Gmail for approvals, enabling smooth approval and rejection processes. By mastering this knowledge, you can achieve paperless expense reporting, faster processing, reduced errors, and reallocate resources to more strategic tasks.
Basics
What is Google Apps Script (GAS)?
Google Apps Script (GAS) is a JavaScript-based scripting language that allows you to connect and customize various Google Workspace applications (Gmail, Sheets, Docs, Calendar, etc.) for automation and feature extension. Its key advantage is that it requires no software installation and can be written and executed directly within a web browser. This makes it relatively easy for users with limited programming expertise to create scripts that automate daily tasks. For instance, you can send a Gmail notification when a specific cell in a Sheet is updated, or create a document based on a calendar event. GAS runs on Google’s servers, meaning scripts continue to operate even when your computer is off, which is a significant benefit for scheduled or event-driven automation.
Managing Expense Data in Google Sheets
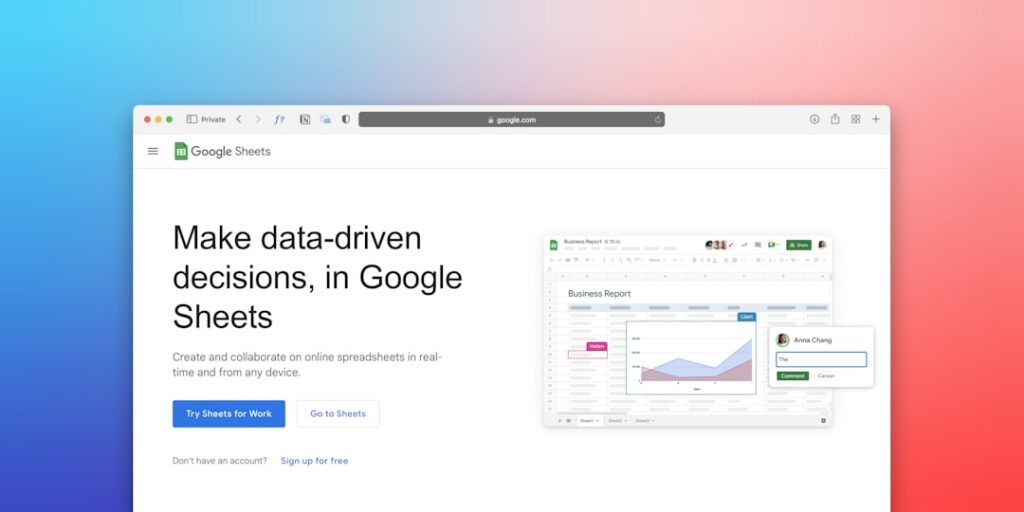
Google Sheets, with its flexibility and versatility, is widely used by many companies for managing expense data. Typically, each row represents an expense claim, with columns for the date, applicant’s name, expense category, amount, description, whether a receipt is attached, and the status (e.g., pending, approved, rejected). By utilizing GAS, this spreadsheet can transform from a simple data record into a dynamic part of a workflow. For example, when the status column changes to ‘Pending’, a GAS script can automatically trigger to notify the approver.
Leveraging Gmail and Trigger Functionality
Gmail, a core service of Google Workspace, integrates powerfully with GAS. Beyond sending emails, GAS can also read incoming emails and process them based on specific criteria. In expense approval workflows, Gmail is primarily used for ‘sending notification emails to approvers’ and ‘providing approval/rejection buttons or links’. GAS features ‘triggers’ that automatically execute scripts in response to specific events, such as editing a Sheet, reaching a certain time, or submitting a form. For expense automation, a common setup is to use a change in the Sheet’s status to ‘Pending’ as a trigger to send a notification email to the approver.
Detailed Analysis
Workflow Design and Thought Process
Successful automation of expense reporting with GAS requires a clear workflow design. It’s essential to define the steps of approval, identify who the approvers are, and determine the subsequent actions upon approval or rejection. A typical workflow might look like this:
- Applicant: Enters expense details into the Sheet and changes the status to ‘Pending’.
- GAS Trigger: Detects the change in the Sheet and executes the script.
- GAS Script: Retrieves applicant information, claim details, and an approval request URL, then sends an email to the approver (a specific address or a designated person in the Sheet). The email includes a summary of the claim and a link (or button) to approve or reject.
- Approver: Clicks the link in the email and changes the status of the relevant claim in the Sheet to ‘Approved’ or ‘Rejected’.
- GAS Trigger: Detects the status change in the Sheet and executes the script.
- GAS Script: Sends an email to the applicant notifying them of the approval result (approved or rejected). If rejected, it may prompt for a reason.
The key at this design stage is to clearly define ‘Who does What, and When’. If there are multiple approvers (e.g., primary and secondary), their order and conditional branching must also be considered. The method for managing approval authority (e.g., a fixed list of approvers, or dynamic assignment based on the claim details) should also be decided at this stage.
Spreadsheet Preparation and Data Structure
The Google Sheet used for expense data should be structured to facilitate access by GAS. It is recommended to include at least the following columns:
- Claim ID: A unique identifier for each claim (e.g., a sequential number). Used by GAS to pinpoint specific claims.
- Date: The date the expense occurred or the claim was submitted.
- Applicant Email: The applicant’s email address, used for notifications.
- Applicant Name: The applicant’s full name.
- Expense Category: e.g., Travel, Entertainment, Supplies.
- Amount: The total cost of the expense.
- Description/Details: A detailed explanation of the expense.
- Attachment URL: A link to attached files like receipts (stored in Google Drive, etc.).
- Approver Email: The email address of the primary approver for this claim.
- Status: The state of the claim (e.g., ‘Pending’, ‘Approved’, ‘Rejected’, ‘Reassigned’). GAS triggers on changes to this column.
- Approval Date: The date of approval or rejection.
- Approver Comments: Comments from the approver (e.g., rejection reason).
In addition to the claim data, creating auxiliary sheets like ‘Approver List’ or ‘Expense Category List’ can simplify reference from GAS and improve manageability. For example, mapping ‘Department’ to ‘Email Address’ in an ‘Approver List’ sheet allows for automatic approver assignment based on the applicant’s department.
GAS Script Creation and Explanation
Here, we’ll explain a basic GAS script that sends an email to the approver when the Sheet status changes to ‘Pending’, and notifies the applicant when the approver clicks a link to change the status.
1. Setting up a Trigger to Detect Spreadsheet Changes
Open your Spreadsheet, navigate to ‘Extensions’ > ‘Apps Script’ to open the script editor. Click the clock icon (Triggers) on the left sidebar and press ‘Add Trigger’. Select the function to run, choose ‘From spreadsheet’ for the ‘Event source’, and ‘On edit’ for the ‘Event type’. This will make the script run every time the spreadsheet is edited. However, to avoid unnecessary executions, it’s advisable to add conditional logic to run the script only when specific cells or sheets are changed.
2. Function to Send Email on Application Submission
Below is a sample GAS code that sends an email notification with claim details when the ‘Status’ column in the spreadsheet is updated to ‘Pending’.
function sendApprovalRequest(e) {
// Use the event object 'e' to get information about the changed sheet and cell
var sheet = e.source.getActiveSheet();
var range = e.range;
var col = range.getLastColumn(); // Last column of the changed cell
var row = range.getRow(); // Row of the changed cell
// Check if the Status column (e.g., 10th column) was changed and the value is "Pending"
if (col === 10 && range.getValue() === "申請中") { // Assuming Status is in the 10th column and value is "Pending"
var dataSheet = SpreadsheetApp.getActiveSpreadsheet().getSheetByName("申請データ"); // Name of the claim data sheet
// var approvalSheet = SpreadsheetApp.getActiveSpreadsheet().getSheetByName("承認者リスト"); // Name of the approver list sheet (if used)
// Get claim data (excluding header row)
var dataRange = dataSheet.getRange(row, 1, 1, dataSheet.getLastColumn());
var rowValues = dataRange.getValues()[0];
var applicantName = rowValues[3]; // Applicant Name (e.g., 4th column)
var amount = rowValues[5]; // Amount (e.g., 6th column)
var description = rowValues[6]; // Description (e.g., 7th column)
var applicantEmail = rowValues[2]; // Applicant Email (e.g., 3rd column)
// Get approver email address (e.g., by searching the Approver List sheet based on applicant's department)
// For simplicity here, we get it directly from the approver email column in the claim data sheet
var approverEmail = rowValues[8]; // Approver Email (e.g., 9th column)
// Email Subject
var subject = "[Approval Required] Expense Claim Notification - " + applicantName;
// Create Email Body (HTML format)
var body = "" + applicantName + " has submitted an expense claim.
" +
"Claim Details:
" +
"" +
"- Amount: " + amount + " JPY
" +
"- Description: " + description + "
" +
"
" +
"Please check the following spreadsheet for details:
" +
"" +
"To approve or reject, please click the following links:
" +
"" +
"(*Replying to this email will not process your request.)
";
// Send Gmail
GmailApp.sendEmail(approverEmail, subject, "", {htmlBody: body});
}
}
Code Explanation:
- `sendApprovalRequest(e)`: The function executed by the trigger. The `e` object contains information about the event.
- `e.source.getActiveSheet()`: Gets the sheet where the change occurred.
- `e.range`: Gets the cell range that was changed.
- `col === 10 && range.getValue() === “申請中”`: Executes the process only if the 10th column (assumed to be the Status column) was changed and its value is ‘Pending’. Adjust the column number according to your spreadsheet.
- `dataSheet.getRange(row, 1, 1, dataSheet.getLastColumn()).getValues()[0]`: Retrieves all data for the changed row as an array.
- `rowValues[…]`: Extracts individual items (applicant name, amount, etc.) from the array. Indices start from 0, so they are one less than the actual column number.
- `ScriptApp.getService().getUrl()`: Gets the URL of the deployed GAS Web App, allowing the email links to call the script.
- `GmailApp.sendEmail()`: Sends the Gmail message. The `htmlBody` option allows for HTML-formatted email content.
3. Handling Approval/Rejection Links
When the approval/rejection links in the email are clicked, a GAS process is needed to update the Sheet status and notify the applicant. This can be achieved by deploying the GAS as a Web App. In the script editor, go to ‘Deploy’ > ‘New deployment’, and select ‘Web Apps’ as the deployment type.
A GAS Web App can receive HTTP requests. The following code is an example of a GAS script that handles requests and performs approval/rejection actions:
function doGet(e) {
  var action = e.parameter.action;
  var row = parseInt(e.parameter.row);
  var sheetId = e.parameter.sheetId;
  var spreadsheetUrl = "YOUR_SPREADSHEET_URL"; // !! IMPORTANT: Replace with your actual Spreadsheet URL !!

  var ss = SpreadsheetApp.openByUrl(spreadsheetUrl);
  // Find the sheet by its ID
  var sheet = ss.getSheets().filter(function(s) { return s.getSheetId() == sheetId; })[0];
  var dataSheet = ss.getSheetByName("申請データ"); // Assumes your data is on a sheet named "申請データ"

  var applicantEmail = dataSheet.getRange(row, 3).getValue(); // Applicant Email (assuming 3rd column)
  var applicantName = dataSheet.getRange(row, 4).getValue(); // Applicant Name (assuming 4th column)
  var approverName = ""; // Approver Name (if identifiable)

  try {
    if (action === "approve") {
      sheet.getRange(row, 10).setValue("Approved"); // Update Status to "Approved" (assuming 10th column)
      sheet.getRange(row, 11).setValue(new Date()); // Set Approval Date (assuming 11th column)
      approverName = sheet.getRange(row, 9).getValue(); // Get Approver Name (assuming 9th column)
      GmailApp.sendEmail(applicantEmail, "[Completed] Expense Claim Approved", applicantName + "'s claim has been approved.");
      return ContentService.createTextOutput("Claim approved. You may close this window.");
    } else if (action === "reject") {
      sheet.getRange(row, 10).setValue("Rejected"); // Update Status to "Rejected" (assuming 10th column)
      sheet.getRange(row, 11).setValue(new Date()); // Set Rejection Date (assuming 11th column)
      approverName = sheet.getRange(row, 9).getValue(); // Get Approver Name (assuming 9th column)

      // Prompt for rejection reason (this part might behave differently depending on execution context)
      // For robustness, consider a dedicated form or sheet for reasons.
      var rejectReason = "No reason provided"; // Default reason
      if (e.parameters.reason) { // If reason is passed via URL parameter
          rejectReason = e.parameters.reason;
      } else {
          // If not passed, you might need a more interactive way or manual entry in Sheet
          // Using Browser.inputBox() here is illustrative but may not work reliably in all Web App contexts.
          // A better approach: instruct user to update the Sheet manually or redirect to a form.
          Logger.log("Rejection reason not provided via URL. Please update the Sheet manually or via a dedicated form.");
          // As a fallback, let's just log and send a generic rejection email.
      }

      sheet.getRange(row, 12).setValue(rejectReason); // Record rejection reason (assuming 12th column)
      GmailApp.sendEmail(applicantEmail, "[Rejected] Expense Claim", applicantName + "'s claim has been rejected. Reason: " + rejectReason);
      return ContentService.createTextOutput("Claim rejected. You may close this window.");
    } else {
      return ContentService.createTextOutput("Invalid request.");
    }
  } catch (error) {
    Logger.log("Error in doGet: " + error.message + "\n" + error.stack);
    // Notify admin about the error
    GmailApp.sendEmail("admin@example.com", "GAS doGet Error", "An error occurred: " + error.message);
    return ContentService.createTextOutput("An error occurred during processing. Please contact the administrator.");
  }
}
Code Explanation:
- `doGet(e)`: Handles GET requests to the Web App.
- `e.parameter.action`, `e.parameter.row`, `e.parameter.sheetId`: Retrieves the action (‘approve’/’reject’), row number, and sheet ID from URL parameters.
- `SpreadsheetApp.openByUrl(spreadsheetUrl)`: Opens the spreadsheet specified by the URL. Remember to replace `YOUR_SPREADSHEET_URL` with your actual spreadsheet URL.
- `sheet.getRange(row, 10).setValue(…)`: Writes ‘Approved’ or ‘Rejected’ to the 10th column (Status) of the specified row.
- `GmailApp.sendEmail(applicantEmail, …)`: Sends a notification email to the applicant about the result.
- The handling of rejection reasons (`Browser.inputBox()`) is illustrative. In a production environment, consider a more robust method like directing the user to update the Sheet directly or use a dedicated Google Form for input.
- `ContentService.createTextOutput(…)`: Returns a message to be displayed in the browser.
Note: The code above is a basic example. In practice, you’ll need to implement error handling (e.g., for non-existent row numbers), verification of the approver (ensuring the correct approver performed the action), handling of multiple approvers, and more sophisticated ways to input rejection reasons. Also, ensure you configure the execution permissions for your Web App appropriately, limiting access to internal users.
Alternative Methods for Approval/Rejection Buttons
Besides embedding links in emails, other methods can prompt for approval/rejection:
- Custom Buttons in Gmail (Gmail API): For a more polished UI, custom buttons can be embedded in emails using the Gmail API, though this is more complex to implement with GAS alone.
- Google Chat/Slack Integration: Send approval requests to chat platforms like Google Chat or Slack instead of Gmail, and handle approval operations from there. GAS can also integrate with the APIs of these chat tools.
- Using Dedicated Forms: Link the GAS-generated Web App URL to a simple form (like Google Forms) for approval/rejection, and update the status upon form submission.
The choice of method depends on user IT literacy, desired UI/UX, and development effort.
Error Handling and Logging
For automated scripts, handling unexpected errors is crucial. GAS allows for error capture using `try…catch` blocks and implementing logging mechanisms.
function sendApprovalRequestWithLogging(e) {
  try {
    // Original script logic goes here
    var sheet = e.source.getActiveSheet();
    var range = e.range;
    // ... (omitted) ...
    GmailApp.sendEmail(approverEmail, subject, "", {htmlBody: body});
    Logger.log("Approval email sent successfully: " + applicantName);
  } catch (error) {
    Logger.log("Error occurred: " + error.message + "\n" + error.stack);
    // Optionally, add logic to notify the applicant or administrator about the error
    // GmailApp.sendEmail("admin@example.com", "GAS Error Notification", "Error: " + error.message);
  }
}
`Logger.log()` output can be viewed in the script editor’s ‘Executions’ log, aiding in troubleshooting. Furthermore, creating a dedicated ‘Log’ sheet in your spreadsheet to record important processing events (successes and failures) is also an effective approach.
Case Studies / Examples
Case Study: Automated Monthly Expense Approval Workflow
Scenario: A department processes monthly expense reports at the end of each month, requiring manager approval. Applicants enter expenses into a Sheet and change the status to ‘Pending’. A GAS script is set to run automatically at the end of the month, notifying the manager via email of any pending claims. The manager clicks a link in the email to approve, and upon approval, the applicant is notified.
Implementation Points:
- Time-Driven Trigger: Instead of an ‘On edit’ trigger, set up a time-driven trigger to run daily (e.g., at 9 AM).
- Batch Processing: The script checks all rows in the Sheet, lists all claims with a ‘Pending’ status.
- Consolidated Email: Send a single email to the manager summarizing all claims submitted that day.
- Individual Approval Links: Generate a unique approval link for each claim within the email.
- Applicant Notification: After approval, the applicant receives a confirmation email.
Calculation Example (within GAS):
You can implement logic in GAS to require an additional approver (e.g., CFO) if the total claimed amount exceeds a certain threshold (e.g., $500).
// ... (after retrieving claim data) ...
var amount = rowValues[5]; // Amount
var approverEmail = rowValues[8]; // Primary approver email
var secondaryApproverEmail = ""; // Secondary approver email

if (amount > 50000) { // Example threshold: 50,000 JPY
  // Get secondary approver (e.g., from Approver List sheet)
  secondaryApproverEmail = approvalSheet.getRange("B2").getValue(); // Example: Fixed CFO email address
  var subject = "[Review Required] High-Value Expense Claim Notification - " + applicantName;
  var body = "..."; // Content for secondary approver notification
  GmailApp.sendEmail(secondaryApproverEmail, subject, "", {htmlBody: body});
  // Change status to 'Pending Secondary Approval' etc.
  sheet.getRange(row, 10).setValue("Pending Secondary Approval");
} else {
  // Proceed with normal approval process
  GmailApp.sendEmail(approverEmail, subject, "", {htmlBody: body});
}
This demonstrates how GAS can dynamically branch approval flows based on data like amount or category, moving beyond simple automation to building workflow management systems.
Pros & Cons
Pros
- Significant Improvement in Operational Efficiency: Reduces manual tasks like form creation, email exchanges, and status updates, drastically cutting down time spent on expense reporting.
- Faster Approval Process: Immediate notifications to approvers and the ability to approve/reject from anywhere expedite decision-making.
- Reduced Errors and Improved Accuracy: Input validation and automatic calculations minimize human errors, ensuring data accuracy.
- Promotion of Paperless Operations: Eliminates the need for paper documents, reducing environmental impact and saving storage space.
- Cost Savings: Reduces costs associated with paper, printing, and postage, as well as optimizing personnel costs through reduced labor time.
- Enhanced Visibility and Trackability: Claim status is centrally managed in the spreadsheet, allowing for real-time progress tracking.
- High Customizability: GAS allows for fine-tuned customization to match specific business workflows.
Cons
- Initial Development Cost and Learning Curve: Creating GAS scripts requires programming knowledge and effort to design and develop according to your specific workflow. Outsourcing may incur costs if in-house expertise is lacking.
- Maintenance Effort: Scripts may require updates or modifications due to Google Workspace specification changes or workflow alterations.
- Security Risks: Improper access permission settings for Web Apps can lead to unintended information exposure. Care must be taken not to hard-code sensitive information in scripts.
- Limitations for Complex Workflows: Highly complex or dynamic approval routes (e.g., where the next approver depends on previous approvals) or advanced integrations with external systems might be challenging or impossible with GAS alone.
- User IT Literacy: If applicants or approvers are not comfortable with basic operations like using spreadsheets or clicking email links, it can pose an implementation barrier.
Common Pitfalls
- Inadequate Trigger Settings: Using ‘On all edits’ triggers can cause scripts to run unnecessarily, while overly strict conditions might prevent execution when needed. Implement clear conditional logic, such as running only when the status changes to ‘Pending’.
- Hardcoding Column Numbers: Scripts relying on fixed column numbers will break if columns are inserted or deleted. Using header names as keys for data retrieval improves maintainability.
- Insufficient Error Handling: Lack of logging makes troubleshooting difficult. Use `try…catch` blocks and `Logger.log()` effectively for prompt issue resolution.
- Incorrect Web App Permissions: Deploying Web Apps with ‘Public’ access can lead to data leaks. Restrict access to specific users or your organization.
- Ignoring Gmail Sending Limits: GAS has daily sending limits (e.g., 100 emails for free accounts, 1500 for Workspace). Plan sending times or recipient lists carefully for high-volume scenarios.
- Web App URL Expiration: Deployed Web App URLs might become invalid depending on deployment settings, requiring periodic redeployment.
- Inefficient Rejection Reason Input: Using `Browser.inputBox()` is often unreliable and provides a poor user experience. Consider having users update the Sheet directly or use a dedicated form for input.
FAQ
Q1: I have no GAS programming experience. Can I still create this?
A1: While creating it entirely from scratch might be challenging, it’s certainly possible to learn and build it gradually, starting with sample code like the one provided in this article. Utilize Google Apps Script’s official documentation, numerous online tutorials, and community forums to deepen your understanding. If you need a system built quickly and reliably, consider hiring an experienced GAS developer or consultant. However, ensure you can clearly articulate your business workflow to them.
Q2: How do I implement a workflow with multiple approvers (e.g., Manager then Director)?
A2: Several methods can handle multiple approvers:
- Step-by-Step Approval via Status Management: Define multiple ‘Status’ columns in the Sheet (e.g., ‘Pending Manager Approval’, ‘Pending Director Approval’, ‘Approved’). GAS sends emails to the respective approvers based on the current status. Once the manager approves, the status changes to ‘Pending Director Approval’, triggering the next notification.
- Dynamic Approver Lookup: Create a mapping table in an ‘Approver List’ sheet that correlates claim details (e.g., department, amount) with approver email addresses. GAS then looks up the appropriate approver based on the claim data.
- Conditional Links in Email: Include links for both primary and secondary approvers in a single email, with logic to proceed once either approves. This can become complex to manage.
Step-by-step approval via status management is generally the most straightforward and easiest to implement.
Q3: Can I attach receipt image files (like PDFs) to the claims?
A3: Yes. The most common method is to upload receipts to Google Drive and include the file’s sharing link in the ‘Attachment URL’ column of the Sheet. When GAS sends the email, it includes this link, allowing the approver to view the receipt. Ensure the Google Drive sharing settings are configured correctly so that approvers have the necessary access.
Q4: Can approval/rejection actions be performed directly within the spreadsheet?
A4: Yes. Instead of clicking email links, you could implement GAS to run when an ‘Approve’ button (created via custom menus or drawing objects in GAS) is clicked directly on the relevant claim row in the Sheet, updating the status. However, this requires spreadsheet access, making the email-based method more convenient for approvers who work remotely or on mobile devices.
Conclusion
By leveraging Google Apps Script (GAS), you can build a robust automated approval workflow for your expense reporting process by integrating Google Sheets and Gmail. This article has provided a comprehensive overview, covering everything from GAS basics, workflow design, spreadsheet preparation, script examples, to pros, cons, pitfalls, and FAQs. This automation promises not only to enhance efficiency, speed, and accuracy in expense reporting but also to yield benefits such as paperless operations and cost reduction. While initial development may require learning investment or specialized expertise, the potential returns are significant. Embrace the knowledge gained from this article to elevate your company’s expense reporting process to the next level.
#GAS #Google Apps Script #経費精算 #承認フロー #Gmail #スプレッドシート #自動化